How to Take a Screenshot in Windows 11
In this article, you will learn about different methods to capture an image of your computer screen. We will look at the most effective and easy-to-use methods that are suitable for both beginners and experienced users.
For most users, the first method is suitable, but for those who need to take a lot of screenshots constantly so that they are automatically saved, look at other methods, such as special software.
1. Screenshot using the Print Screen key
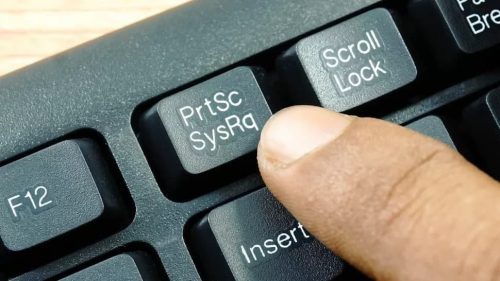
The easiest and most famous way to take a screenshot in Windows is to use the Print Screen key. On the keyboard, it is often referred to as Print Screen, PrtScn, or PrtSc. Pressing this key will take a screenshot of the entire screen and copy it to the clipboard.
After that, you can paste the captured screenshot into Paint, WhatsApp or any similar application using either the right-click and the “Paste” function, or the keyboard shortcut Ctrl + V.
1. Press Print Screen Button.
2. Paste, using Ctrl+V combination into Paint, WhatsApp, Telegram, Messenger to get screenshot there.
2. Screenshot saved as a file
With the previous method, the snapshot is saved to the clipboard and you have to paste it into an application like Paint or similar to save it. But another way may be suitable for you, when you can immediately create a file. To do this, use the keyboard shortcut Windows + Print Screen.
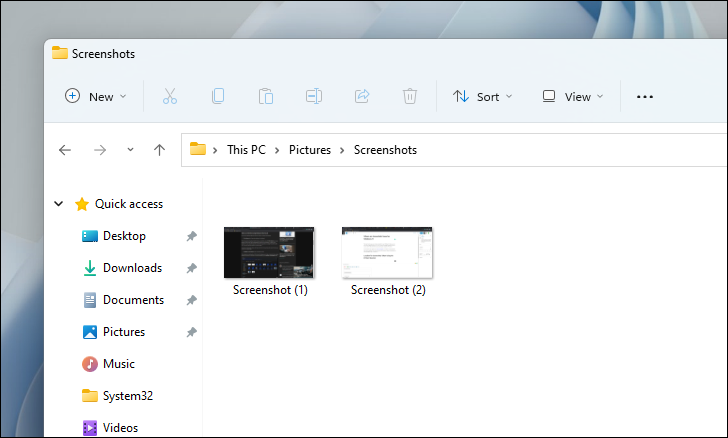
The entire desktop will go dark for a second to show that a screenshot has been taken, and a new “PNG” file will be saved in the Pictures section of the Screenshots folder.
1. Press ⊞Win + Print Screen Button.
2. Go to This PC>Pictures>Sceenshots, the screenshot will appear there.
3. Screenshot using the Snipping Tool
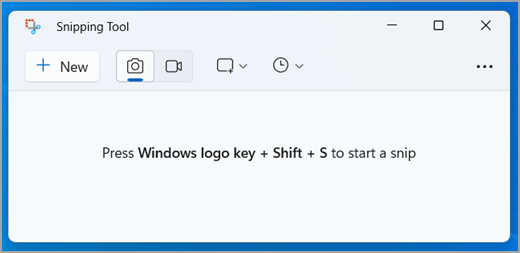
If necessary, you have the opportunity to take a screenshot of part of the screen. To do this, use the keyboard shortcut Win + Shift + S and the cropping toolbar will open. Here you will see the following menu items:
- Rectangular Slice: Allows you to select an area to capture by drawing a rectangle.
- Freeform Fragment: Allows you to capture irregularly shaped elements on your desktop.
- Window Snip: Allows you to click on a window to take a screenshot.
- Full Screen Capture: This is equivalent to pressing the Print Screen key as it takes a snapshot of the entire screen.
Select the area you want to take a screenshot of and it will be saved to the clipboard.
After that, you can paste the captured screenshot into Paint, WhatsApp or any similar application using either the right-click and the “Paste” function, or the keyboard shortcut Ctrl + V.
To use Snipping Tool’s advanced features, such as recording video or editing a screenshot, you must open app, for this enter Snipping Tool in the Windows Search box. Then this program will open.
You can read more about what you can do in this program and how to use it on the Microsoft Website.
1. Press ⊞Win + Shift + S Button.
2. Select the area you want to take a screenshot of.
3. Paste, using Ctrl+V combination into Paint, WhatsApp, Telegram, Messenger to get screenshot there.
4. Use the Game Bar
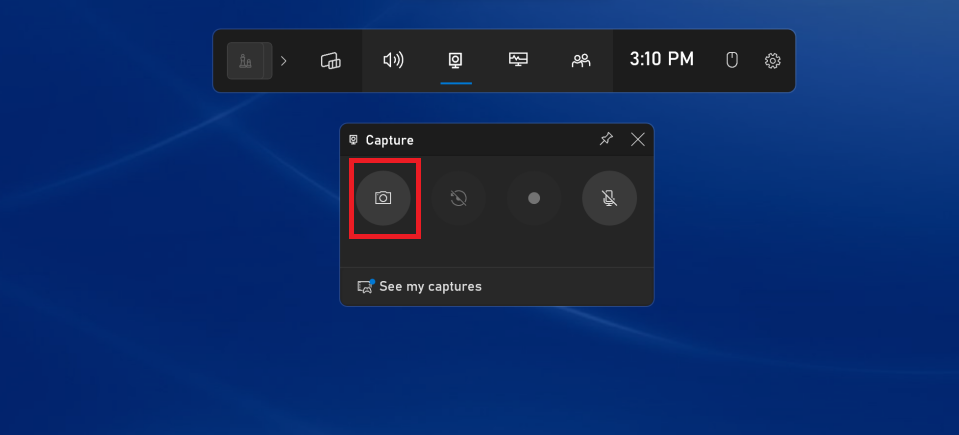
To open the Game bar use Win + G.
From there, if you go to the Capture window, you see a camera icon. Tap it and your screenshot is saved, somewhat counterintuitively, to the This PC>Videos>Captures folder under your main user folder. You can change the target folder in the main Windows Settings app.
Alternatively, you can press Win + Alt + PrtScn to bypass opening the Game bar.
1. Press ⊞Win + Alt + PrntScrn Button.
2. Tap camera icon.
3. Go to This PC>Videos>Captures, the screenshot will appear there.
5. LightShot – Screen Capure Tool
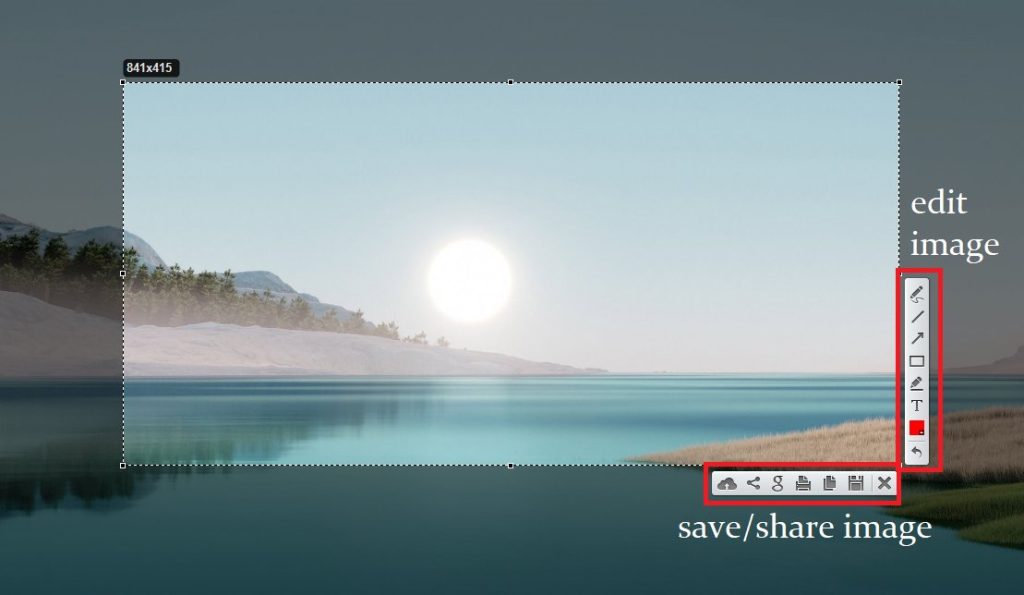
Lightshot is a free tool you can download on your computer to take image screenshots quickly. It allows you to share those screenshots, save them to your computer, edit them, upload them to the cloud, copy data, and do many other things.
You have to download Lightshot app to use it. Go to official site – app.prntscr.com and download it. Next is what you have to do – install it on your PC.
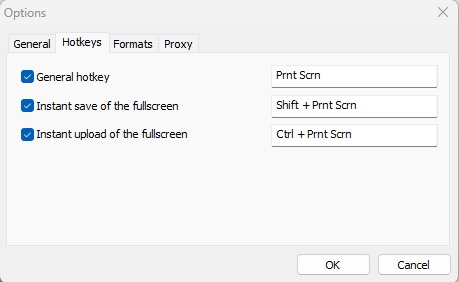
After downloading the Lighshot app, you can take screenshots by simply pressing the shortcut keys on your keyboard. The shortcut key to take a screenshot is Prnt Scrn. Choose area of screenshot and what you want to do with it – edit, save as file, share.
You can directly press:
- Shift + Prnt Scrn to take a SS and save it on your PC automatlically.
- Ctrl + Prnt Scrn to directly upload screenshot to website and get a link. (You must enable this option in the application settings)
Screenshot will apear in This PC>Documents>Lightshot (if you save it on PC) or if you share it, then in website “https://prnt.sc/{uniqued_id}“. You can share the link anywhere.
1. Download the app, install it.
2. Press PrntScrn Button.
3. Choose area of screenshot and what you want to do with it – edit, save as file, share.
4. Go to This PC>Documents>Lightshot, the screenshot will appear there. Or upload screenshot directly on the site and get the link.
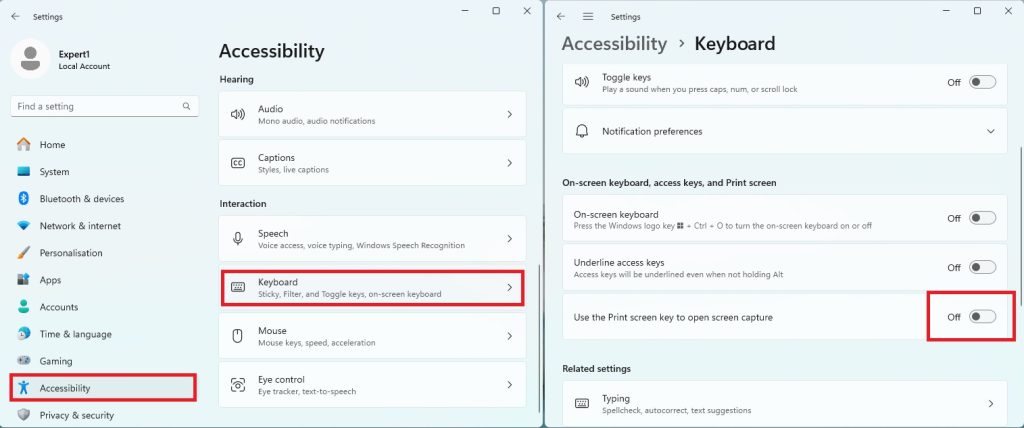
Attention! If clicking Prnt Scrn Snipping Tool automatically opens and doesn’t allow you to open LightShot, type “Settings” in the Search Bar and open it. Go to Accessibility > Keyboard and uncheck “Use the Print Screen key to open screen capture”.
6. Free ScreenRec Software
Screenrec is a free screenshot and screen recording software that offers a number of features and benefits. The application does not load your system at all.
Possibilities:
- Video and Audio Recording: In addition to taking screenshots, Screenrec allows you to record video of your computer screen along with audio. This can be useful for creating training materials, presentations or video reviews.
- Instant Cloud Storage: Screenrec automatically uploads recorded videos and screenshots to the cloud, providing an instant sharing link. This allows for easy access and distribution of materials. Markings and
- Annotations: Users can add annotations, hints and markers directly while taking screenshots or recording videos.
- Easy to Setup: Screenrec allows you to customize various recording settings, including resolution, audio and video quality, hotkeys and other settings.
- Built-in gallery: Users can easily view all the screenshots they take in a gallery, making it easier to find the images they need.
To use this software, you must download it here – screenrec.com. Install it, open, create account.
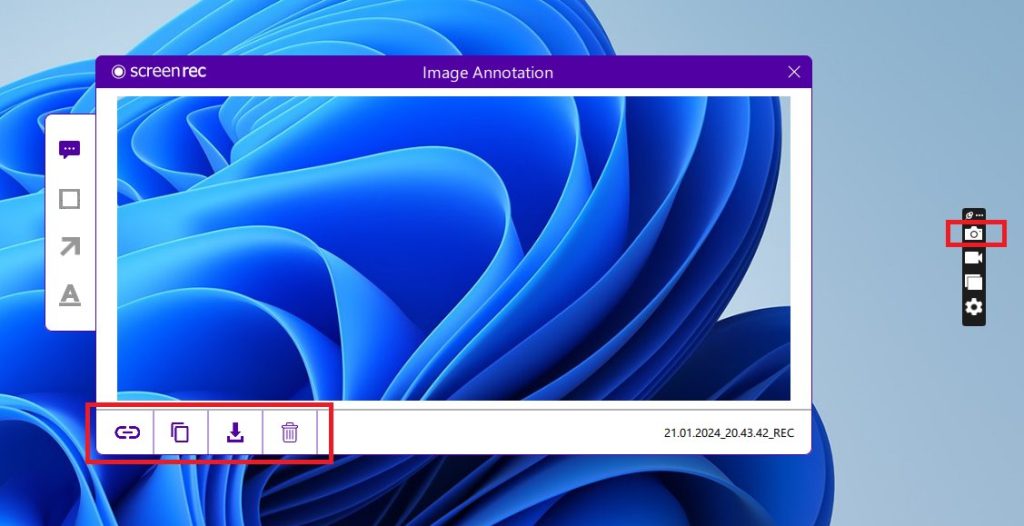
To take screenshot – press on camera icon. Next is select screenshot area. You can save it on PC or upload directly on web server and share the link with picture.
1. Download, install, register in the app.
2. Tap camera icon.
3. Save it on PC or upload on web server and share the link.
7. Snagit for Professionals
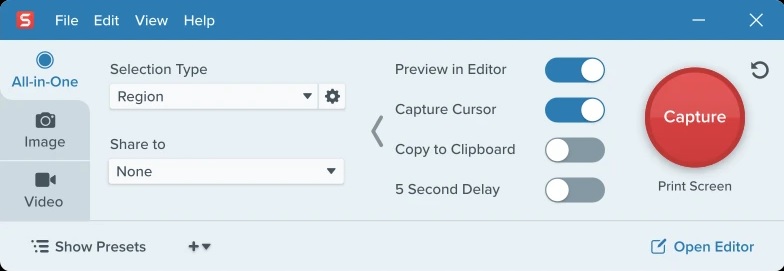
Snagit is not free program, with the possibility of trial use for creating screenshots and editing videos. The advantage of this program is that it allows you to edit elements of a screenshot, add annotations, recognizes text that can be copied or changed, and also allows you to upload screenshots and videos automatically to different services. It has a library, where you can sort images as you want.
To use it simple download the program and install it, create an account and try trial version. Open Snagit, next is capture image, edit it, save or share.
1. Download, install, register in the app.
2. Capture image, edit it.
3. Save it on PC or share where you want.
Frequently Asked Questions (F.A.Q.)
Here are the answers for most asked questions.
• How do I take a screenshot in Windows 11?
Use the Windows+PrtSc keyboard combination to capture the whole screen or use the Snipping Tool to select a mode. Another way to take screenshots on Windows 11 is to use the Game Bar by pressing Windows+G and selecting the Capture icon to take the screenshot.
• How do I take screenshots on a Windows 11 laptop?
If your laptop model assigns more than one purpose to the PrtSc key, you might need to use the Fn+PrtSc keyboard combination to save full-screen shots.
• What is the easiest way to take Screenshot in Windows 11?
Simply press the PrtScn key on your keyboard. This will capture the entire screen and copy the screenshot to your clipboard. You can then paste (Ctrl + V) the screenshot into any program that supports image editing.
• How to take Screenshot and get link on the web?
Using programs such as Lightshot and ScreenRec, you can immediately automatically upload a picture to a web server and receive a link to view the screenshot. Without these programs, you can save the picture on your PC and then upload it to the website prnt.sc.
Conclusion
We hope you found this article helpful and helped you understand the various ways to take a screenshot in Windows 11.
As you have seen, the operating system provides many convenient tools for capturing screen images, ranging from simple and quick methods such as “Print Screen” and “Alt + Print Screen“, to more advanced features like the Snipping Tool and the Xbox Game Bar.
The method you choose depends on your specific needs: whether you need a quick screenshot of the entire screen or a more detailed screenshot of a specific area.
Don’t forget also about the ability to take screenshots using third-party programs that may offer additional features and settings.
